
Category: Hospital Discharge & Home Preparation

  • What Equipment Should Be Ready Before Hospital Discharge?

    What Equipment Should Be Ready Before Hospital Discharge?

    Equipment before hospital discharge should be checked before the person comes home—not after they arrive.

    Equipment before hospital discharge should be confirmed before the person comes home, not after they arrive. A recommendation may involve a walker, shower seat, toilet support, mobility aid, bedside item, or another product intended to help with the return home. Ordering an item is not the same as having it ready to use.

    Before discharge, confirm exactly what was recommended, whether it has arrived, whether it needs assembly or installation, where it should be placed, and whether any instructions from the discharge team, occupational therapist, physical therapist, or another professional still need to be clarified.

    Not sure what else around the home may need attention?

    Equipment Before Hospital Discharge: What to Check

    1. Confirm Exactly What Was Recommended

    Start with the discharge paperwork and any instructions from the hospital, rehabilitation facility, occupational therapist, physical therapist, nurse, physician, or other professional involved in the return-home plan.

    Write down the specific equipment that was recommended.

    Do not rely on memory or assume that a similar-looking product will work the same way.

    If the recommendation is unclear, ask the professional who made it to clarify the type of equipment, intended use, and any important setup or placement instructions.

    2. Make Sure the Equipment Has Actually Arrived

    An item that has been ordered is not necessarily ready for use.

    Before the planned return home, confirm whether each recommended item has:

    • been delivered;
    • arrived in the correct size or configuration;
    • been assembled if required;
    • been installed if required;
    • been placed where it is expected to be used.

    If something is still in transit, delayed, or backordered, identify that early enough to discuss alternatives with the appropriate professional.

    3. Check Assembly and Installation Requirements

    Some equipment can be placed and used with minimal setup. Other items may require assembly, secure installation, or professional work.

    Do not assume that an item is ready simply because the box has arrived.

    Review the manufacturer’s instructions and any guidance from the professional who recommended the equipment.

    If installation involves structural work, electrical work, permanent mounting, or another task outside normal household setup, consider an appropriate qualified professional.

    4. Put the Equipment Where It Will Actually Be Used

    Placement matters.

    A recommended item may not help if it is stored in another room, blocks a walking route, or is difficult to reach when needed.

    Look at the actual location where the equipment is expected to be used and make sure there is enough usable space around it.

    Avoid placing equipment in a way that creates a new obstacle in a doorway, hallway, bathroom, or bedside route.

    5. Confirm the Equipment Works With the Home Layout

    The home itself affects whether equipment can be used as expected.

    Check doorway width, floor space, turning room, bathroom layout, bed placement, and walking routes.

    A product that works in one home may not fit or function the same way in another.

    When fit, placement, or suitability is uncertain, confirm the expected setup with the discharge team, OT, PT, or another relevant professional before relying on the equipment.

    Equipment Should Be Ready Before the Person Comes Home

    6. Understand How the Equipment Is Supposed to Be Used

    Having equipment in the home is only part of the preparation.

    Make sure the person who will use the equipment—and anyone expected to assist—understands the basic instructions that came with it and any guidance provided by the recommending professional.

    Do not guess at positioning, adjustments, transfer techniques, or other use instructions when those details affect suitability or safety.

    If anything is unclear, confirm it with the discharge team, OT, PT, supplier, manufacturer, or another appropriate professional before relying on the equipment.

    7. Avoid Buying Equipment “Just in Case”

    Families sometimes feel pressure to buy several products quickly before someone comes home.

    That can lead to unnecessary purchases, duplicated equipment, or products that do not match the person’s actual needs or the layout of the home.

    Start with what has actually been recommended.

    Then identify what still needs to be clarified before purchasing anything else.

    For simple household products that do not depend on the person’s medical condition or mobility needs, consider whether they solve a specific home-preparation problem rather than adding items simply because they seem useful.

    8. Have a Plan if Something Is Delayed

    If a recommended item has not arrived, do not wait until the return-home day to discover the problem.

    Confirm the expected delivery date and whether any setup or installation is still required.

    If the equipment will not be ready in time, contact the relevant professional and ask whether another temporary arrangement is appropriate.

    Do not substitute equipment on your own when the recommendation depends on the person’s abilities, mobility, transfers, or other clinical factors.

    Equipment Checklist Before Hospital Discharge

    Reviewing equipment before hospital discharge can help families catch delivery, setup, placement, or instruction problems before the return home:

    • Do you know exactly what equipment was recommended?
    • Do you know who recommended it?
    • Has the correct item arrived?
    • Is the size or configuration correct?
    • Has it been assembled?
    • Has it been installed if installation is required?
    • Is it positioned where it will actually be used?
    • Does it fit the available space?
    • Does it interfere with walking routes or doorways?
    • Have the user and helper instructions been reviewed?
    • Are any setup or use questions still unclear?
    • Is anything still delayed or backordered?
    • Have uncertain substitutions or alternatives been confirmed with the appropriate professional?

    The Agency for Healthcare Research and Quality encourages patients and families to be involved in discharge planning and understand what will be needed at home.

    Start With What Was Actually Recommended

    More equipment is not always better.

    The goal is to make sure the items that are genuinely needed are present, usable, and properly set up before the person comes home.

    Start with the recommendations already made by the hospital, rehabilitation team, OT, PT, or other professionals involved in the discharge plan.

    Then address any remaining home-preparation needs one at a time.

    Use the Home Readiness Check

    Not sure what else around the home may need attention?

    The Discharge Ready Home Home Readiness Check walks through entrances, walking routes, bathrooms, sleeping areas, lighting, equipment, and available help one step at a time.

    At the end, you receive a personalized Home Readiness Plan showing things worth preparing, verifying, or arranging.

    For a broader review of the entire home, use our Hospital Discharge Home Checklist before the planned return.

    If you are also preparing the sleeping area, see our guide to Prepare a Bedroom After Hospital Discharge.

    Important Note

    Discharge Ready Home provides general educational information about preparing the physical home.

    This article does not determine whether someone is ready for discharge, prescribe medical equipment, certify that equipment is appropriate or safe for a particular person, or replace an individualized assessment or instructions from physicians, nurses, occupational therapists, physical therapists, discharge planners, suppliers, manufacturers, or other qualified professionals.

    When equipment selection, setup, placement, or use depends on a person’s mobility, abilities, transfers, assistance needs, or medical restrictions, confirm the appropriate approach with the healthcare professionals involved in that person’s care.


  • Clearing Walking Routes Before Someone Comes Home From the Hospital

    Clearing Walking Routes Before Someone Comes Home From the Hospital

    Walking routes after hospital discharge can work differently than they did before the hospital or rehabilitation stay. A path that feels normal to someone walking independently may become difficult with a walker, wheelchair, slower movement, or hands-on assistance.

    Start with the routes the person will actually use most often: entrance to bathroom, bedroom or recovery area, kitchen, and main living space.

    You do not need to clear the entire house. Focus first on the paths that matter most during the first days home.

    Not sure what else around the home may need attention?

    Walking Routes After Hospital Discharge: What to Check

    1. Start With the Routes They Will Use Most

    Do not try to reorganize the entire house at once.

    Walk the routes the person is most likely to use during the first days home, including:

    • entrance to bathroom;
    • entrance to bedroom or recovery area;
    • bedroom to bathroom;
    • bedroom to kitchen or main living area.

    Focus first on those everyday paths.

    2. Remove Clutter and Small Obstacles

    Look for items that reduce usable walking space or make the route harder to follow.

    Common examples include:

    • boxes;
    • laundry baskets;
    • pet beds and toys;
    • shoes;
    • small tables;
    • decorative items;
    • bags or packages left near doorways.

    Move unnecessary items out of the route before purchasing equipment or considering larger changes.

    3. Review Rugs, Mats and Floor Transitions

    Look closely at loose rugs, floor mats, curled edges, and transitions between different flooring surfaces.

    A rug that never caused a problem before may work differently when someone is moving more slowly, using mobility equipment, or receiving assistance.

    If a rug or mat interferes with the expected route, consider moving it rather than assuming another product is needed.

    Also note raised thresholds or changes in floor level that may need closer review.

    4. Check Cords and Furniture Placement

    Electrical cords, charging cables, lamp cords, and extension cords can narrow a walking path or create awkward routes around furniture.

    Look at how cords cross or run alongside the paths the person will use.

    Move cords and small furniture where practical so the route stays as direct and open as possible.

    Do not create a new obstacle simply to relocate an existing one.

    5. Look for Tight Turns and Narrow Passages

    A hallway may appear wide enough until someone needs to turn with a walker, wheelchair, or another person assisting.

    Walk the entire route and pay attention to:

    • tight corners;
    • narrow doorways;
    • furniture near turns;
    • hallway tables;
    • doors that open into the path;
    • limited room near the bathroom or bedroom entrance.

    If clearance is uncertain, measure the narrowest usable opening and compare it with the actual mobility equipment expected to be used.

    Check the Route in Real Conditions

    6. Check the Route During the Day and at Night

    Reviewing walking routes after hospital discharge in normal daytime and nighttime conditions can reveal obstacles that are easy to miss during a quick walkthrough. A route that feels easy during daylight may work differently after dark.

    Walk the path from the bedroom or recovery area to the bathroom at night. Check whether lights can be turned on before entering darker areas and whether shadows make steps, thresholds, or furniture harder to see.

    Simple plug-in or motion-activated lighting may help where it improves visibility without creating a new obstacle.

    Follow manufacturer instructions for placement and use.

    If permanent lighting changes are needed, consider a qualified electrician.

    7. Think About Pets and Everyday Household Activity

    Pets can change how a walking route works from one moment to the next.

    Food bowls, toys, beds, leashes, and pets moving through hallways can all affect the path someone uses.

    During the initial return-home period, consider moving pet items out of the main walking routes and keeping commonly used paths as predictable as possible.

    The same applies to frequently moved household items such as laundry baskets, packages, stools, and folding chairs.

    8. Review the Route to the Bathroom Carefully

    The bathroom is one of the most important destinations to review before someone comes home.

    Walk the full route from the sleeping or recovery area to the bathroom.

    Look at:

    • doorway clearance;
    • flooring;
    • thresholds;
    • turns;
    • rugs;
    • furniture;
    • lighting;
    • space for mobility equipment or another person to assist.

    If the route does not appear workable, first consider whether another bathroom or sleeping area creates a simpler existing path.

    9. Make Sure the Expected Help Is Actually Available

    Some walking routes may work only when another person is available to assist.

    Confirm who will actually be present and what help they are expected to provide.

    If the level of assistance needed for walking, turning, or moving between rooms is unclear, confirm it with the discharge team, occupational therapist, physical therapist, or another appropriate professional.

    Do not plan the route around assistance that may not actually be available.

    The Agency for Healthcare Research and Quality encourages patients and families to take part in discharge planning and understand what will be needed at home.

    Walking Route Checklist Before Hospital Discharge

    Before the planned return home, review these items:

    • Are the main routes clear of clutter?
    • Have loose rugs or mats been reviewed?
    • Are cords out of the main walking paths?
    • Is furniture placed so the route stays open?
    • Are tight turns or narrow passages identified?
    • Is there enough usable clearance for the mobility equipment expected?
    • Is the route to the bathroom practical?
    • Is the route adequately lit at night?
    • Are pet items out of the main walking paths?
    • Is there room for another person to assist if needed?
    • Have uncertain mobility or assistance needs been verified with the appropriate professional?

    Start With the Simplest Changes

    Preparing walking routes does not usually require major work.

    Moving furniture, clearing clutter, relocating cords, removing unnecessary rugs, or using a different route may solve the immediate problem.

    Start with the simplest practical changes first.

    Then decide whether anything still needs to be measured, verified, purchased, or professionally evaluated.

    Use the Home Readiness Check

    Not sure what else around the home may need attention?

    The Discharge Ready Home Home Readiness Check walks through entrances, walking routes, bathrooms, sleeping areas, lighting, equipment, and available help one step at a time.

    At the end, you receive a personalized Home Readiness Plan showing things worth preparing, verifying, or arranging.

    For a broader review of the entire home, use our Hospital Discharge Home Checklist before the planned return.

    If the main concern is getting into the home, see our guide to Preparing Entrances and Steps After Hospital Discharge.

    Important Note

    Discharge Ready Home provides general educational information about preparing the physical home.

    This article does not determine whether someone is ready for discharge, certify that a walking route or home is safe, prescribe equipment, or replace an individualized assessment or instructions from physicians, nurses, occupational therapists, physical therapists, discharge planners, or other healthcare professionals.

    When walking-route preparation depends on a person’s mobility, balance, abilities, equipment, assistance, or medical restrictions, confirm the appropriate approach with the healthcare professionals involved in that person’s care.

  • Preparing Entrances and Steps Before Someone Comes Home From the Hospital

    Preparing Entrances and Steps Before Someone Comes Home From the Hospital

    Preparing the entrance after hospital discharge starts before the front door. Begin at the place where the vehicle will actually stop and follow the route the person expects to use when coming home.

    Steps, uneven surfaces, narrow doorways, thresholds, distance from the vehicle, and available assistance can all affect whether that route works as expected.

    Before planning construction or buying equipment, look for the simplest existing solution. Another entrance, a clearer route, or a different drop-off point may work better during the initial return-home period.

    Not sure what else around the home may need attention?

    How to Prepare an Entrance After Hospital Discharge

    1. Start at the Actual Drop-Off Point

    Begin where the vehicle will really stop.

    Walk the route from that point to the entrance the person expects to use. Look at distance, slope, uneven surfaces, curbs, grass, gravel, narrow areas, and anything else that could make the route harder with a walker, wheelchair, or hands-on assistance.

    Do not assume the front door is automatically the best entrance.

    2. Look at Every Practical Entrance

    If the usual entrance has steps, a narrow doorway, or a difficult surface, check the other entrances before planning modifications.

    A garage entrance, side door, or another existing route may work better during the first days or weeks at home.

    Compare each realistic entrance based on:

    • distance from the vehicle;
    • walking surface;
    • number of steps;
    • handrails;
    • doorway clearance;
    • threshold height;
    • space for mobility equipment or assistance.

    The simplest workable existing route should usually be considered first.

    3. Review Steps and Handrails

    If the planned entrance has steps, look at how many there are and whether a secure handrail is already available.

    Do not assume someone can or cannot manage the steps after discharge.

    If stair use is uncertain, confirm what is expected with the discharge team, occupational therapist, physical therapist, or another professional involved in the return-home plan.

    If another entrance avoids the steps entirely, that may provide a simpler immediate option.

    4. Check Doorway Clearance

    A doorway that feels wide when walking independently may work differently with a walker, wheelchair, or another person assisting.

    Measure the usable clear opening, not simply the nominal door width.

    Look at the narrowest point of the route, including:

    • gates;
    • exterior doors;
    • screen doors;
    • tight turns;
    • hallway openings;
    • furniture near the entrance.

    Compare those measurements with the actual mobility equipment expected to be used.

    5. Look at the Threshold

    Check the transition at the doorway itself.

    Raised thresholds, uneven flooring, or a change in surface can affect how easily someone moves through the entrance.

    Do not automatically purchase a ramp or threshold product because the transition looks difficult.

    First confirm the actual mobility equipment and assistance expected. If a modification may be needed, an accessibility professional can help evaluate appropriate options.

    Walk the planned arrival route before the discharge date rather than waiting until the person is already on the way home.

    Use the actual drop-off point, entrance, doorway, and interior path that will be used. If another person is expected to help, include that person in the test when possible.

    Pay attention to anything that still needs to be cleared, measured, verified, or arranged.

    6. Check Lighting Around the Entrance

    Look at the route during the time of day the person is likely to return home and again after dark.

    Check whether the drop-off area, walkway, steps, doorway, and threshold are adequately visible.

    Simple lighting improvements may help where they improve visibility without creating a new obstacle.

    If permanent electrical changes are needed, consider a qualified electrician.

    7. Consider Weather and Surface Conditions

    An entrance that works well on a dry day may be more difficult during rain or other poor weather.

    Look for slick surfaces, standing water, loose gravel, uneven pavement, leaves, mats, or other conditions that could affect the route.

    Clear what can reasonably be cleared before the planned return.

    Avoid making permanent changes based only on one temporary condition. Start with the simplest practical preparation.

    8. Make Sure the Expected Help Is Actually Available

    Some entrances work only when another person is there to assist.

    Confirm who will be present when the person comes home and what kind of help they are expected to provide.

    If the amount of assistance needed for steps, walking, or entering the home is unclear, confirm it with the discharge team, OT, PT, or another appropriate professional.

    Do not plan around assistance that may not actually be available.

    Entrance Preparation Checklist Before Hospital Discharge

    Before the planned return home, review these items:

    • Is the vehicle drop-off point practical?
    • Is the route from the vehicle to the entrance clear?
    • Are there uneven or difficult walking surfaces?
    • Are steps involved?
    • Is a secure handrail available where needed?
    • Is another existing entrance easier to use?
    • Is the doorway wide enough for the mobility equipment expected?
    • Has the usable clear opening been measured if needed?
    • Is the threshold easy to navigate?
    • Is there enough room for another person to assist?
    • Is the route adequately lit?
    • Have any uncertain stair, mobility, or assistance needs been verified with the appropriate professional?

    Start With the Easiest Existing Entrance

    The best immediate solution may already exist.

    Before planning ramps, doorway changes, or other modifications, compare every practical entrance to the home.

    A garage entrance, side door, shorter walking route, or different drop-off point may work better during the initial return-home period.

    Use the simplest workable option first. Then decide whether any longer-term change is actually necessary.

    Use the Home Readiness Check

    Not sure what else around the home may need attention?

    The Discharge Ready Home Home Readiness Check walks through entrances, walking routes, bathrooms, sleeping areas, lighting, equipment, and available help one step at a time.

    At the end, you receive a personalized Home Readiness Plan showing things worth preparing, verifying, or arranging.

    For a broader review of the entire home, use our Hospital Discharge Home Checklist before the planned return.

    Important Note

    Discharge Ready Home provides general educational information about preparing the physical home.

    This article does not determine whether someone is ready for discharge, certify that an entrance or home is safe, prescribe equipment, or replace an individualized assessment or instructions from physicians, nurses, occupational therapists, physical therapists, discharge planners, or other healthcare professionals.

    When entrance preparation depends on a person’s mobility, abilities, stair use, equipment, assistance, or medical restrictions, confirm the appropriate approach with the healthcare professionals involved in that person’s care.

    The Agency for Healthcare Research and Quality encourages patients and families to be involved in discharge planning and to understand what will be needed at home.

  • Preparing the Bedroom Before Someone Comes Home From the Hospital

    Preparing the Bedroom Before Someone Comes Home From the Hospital

    Preparing a bedroom after hospital discharge can make the first days at home easier to manage.

    Start by looking at how the person will reach the room, how much clear space is available around the bed, whether mobility equipment can move through the area, and whether another person may need room to assist.

    You do not need to redesign the bedroom. Small changes such as moving furniture, clearing the path to the bed, improving lighting, or temporarily using a different room may solve the immediate problem.

    How to Prepare a Bedroom After Hospital Discharge

    1. Make Sure the Bedroom Can Be Reached

    When preparing a bedroom after hospital discharge, start with the route to the room, usable space around the bed, lighting, and the help that will actually be available.

    Walk from the main entrance to the planned sleeping area using the same route the person will use when they return home. Look for stairs, narrow doorways, tight turns, rugs, cords, furniture, or other obstacles that could make the route difficult with a walker, wheelchair, or hands-on assistance.

    If the bedroom requires stairs, do not assume the person will be able to use them after discharge. Confirm expected stair use with the discharge team, occupational therapist, physical therapist, or other professional involved in the return-home plan.

    If stairs may be difficult, look for an existing room on the main level that could temporarily serve as a sleeping or recovery space.

    2. Clear the Path to the Bed

    Once you reach the room, look at the path from the doorway to the bed.

    Remove unnecessary furniture, boxes, laundry baskets, electrical cords, loose rugs, and other items that reduce usable walking space.

    Think about the way the person is expected to move through the room. A pathway that feels wide enough for someone walking independently may work differently with a walker, wheelchair, or another person providing assistance.

    Make the simplest changes first. Moving furniture may solve the immediate problem without purchasing equipment or modifying the room.

    3. Leave Usable Space Around the Bed

    Look at the space beside and around the bed.

    The person may need room to approach the bed with mobility equipment, turn around, sit down, or receive assistance from another person.

    Avoid filling the area around the bed with extra furniture or equipment unless it is actually needed.

    If you are unsure how much assistance or space will be required around the bed, confirm the expected needs with the appropriate member of the discharge or rehabilitation team.

    4. Think About Bed Placement

    The bed does not always need to remain in its usual position.

    A temporary rearrangement may provide a clearer path from the doorway, bathroom, or seating area.

    Look for a position that reduces unnecessary obstacles and provides practical access to the side of the bed that the person is expected to use.

    Do not assume that a different bed, bed rail, transfer device, or other support product is automatically necessary. When equipment has been recommended, confirm the specific type and intended use with the healthcare professional who made the recommendation.

    5. Check the Route to the Bathroom

    The bedroom and bathroom should not be considered separately.

    Walk the route between them during the day and again after dark.

    Look for clutter, rugs, cords, tight turns, thresholds, and areas where lighting is poor.

    If the bathroom is far from the planned sleeping area, consider whether another existing bedroom or temporary recovery space provides a more practical arrangement during the first days home.

    6. Review Nighttime Lighting

    Check whether the person can see the route from the bed to the bathroom before entering a dark hallway or room.

    Simple plug-in or motion-activated lighting may help improve visibility when it can be placed without creating another obstacle.

    Follow the manufacturer’s instructions for placement and use.

    If permanent electrical changes are needed, consider a qualified electrician.

    Consider a Temporary Recovery Space

    The usual bedroom is not always the best place for the first days or weeks after someone returns home.

    A same-level room may avoid stairs, provide easier bathroom access, or offer more room for mobility equipment and assistance.

    A temporary arrangement does not mean the home needs a permanent remodel. Use the simplest workable existing space first, then decide later whether longer-term changes are actually necessary.

    Confirm Recommended Equipment Before Relying on It

    If the hospital, rehabilitation facility, occupational therapist, physical therapist, or another member of the discharge team recommended equipment for the bedroom or recovery area, confirm exactly what was recommended before the person comes home.

    Check whether the item has arrived, whether it needs assembly or installation, and where the recommending professional expects it to be used.

    Do not substitute a different product simply because it appears similar.

    The Agency for Healthcare Research and Quality encourages involving patients and families in discharge planning so they understand what will be needed at home.

    If you are uncertain about suitability, placement, or use, confirm those details with the professional who made the recommendation before relying on the equipment.

    Make Room for the Help That Will Actually Be Available

    Some bedroom arrangements only work when another person is available to help.

    Think about whether a family member, caregiver, or other person will need room beside the bed, near the doorway, or along the route to the bathroom.

    Confirm who will actually be available and when.

    If the amount of assistance expected is unclear, ask the discharge team, OT, or PT what level of help they expect at home.

    Do not arrange the room around assistance that may not actually be available.

    Bedroom Preparation Checklist Before Hospital Discharge

    Before the planned return home, review these items:

    • Can the person reach the sleeping area using the mobility equipment or assistance expected?
    • Are stairs involved?
    • Is there a workable same-level alternative if needed?
    • Is the route from the doorway to the bed clear?
    • Is there enough usable space around the bed?
    • Can unnecessary furniture or clutter be moved?
    • Is there room for mobility equipment?
    • Is there room for another person to assist if needed?
    • Is the route from the bedroom to the bathroom practical?
    • Is that route adequately lit at night?
    • Has recommended equipment arrived and been set up?
    • Have any uncertain equipment or assistance needs been verified with the appropriate professional?

    Then add this H2:

    Start With the Simplest Workable Solution

    Preparing the bedroom does not always require buying equipment or changing the home permanently.

    Moving furniture, clearing a walking path, improving lighting, or temporarily using another room may solve the immediate problem.

    Start with the existing home and the way the person is expected to move and receive assistance.

    Then address anything that still needs to be verified, purchased, arranged, or professionally evaluated.

    For a broader review of the entire home, use our Hospital Discharge Home Checklist to review entrances, walking routes, bathrooms, sleeping areas, lighting, equipment, and available help before they come home.

    Use the Home Readiness Check

    Not sure what else in the home may need attention?

    The Discharge Ready Home Home Readiness Check walks through the entrance, walking routes, bathroom, sleeping area, lighting, equipment, and available help one step at a time.

    At the end, you receive a personalized Home Readiness Plan showing things worth preparing, verifying, or arranging.

    For a broader review of the entire home, use our Hospital Discharge Home Checklist before the planned return.

    Important Note

    Discharge Ready Home provides general educational information about preparing the physical home.

    This article does not determine whether someone is ready for discharge, certify that a bedroom or home is safe, prescribe medical equipment, or replace an individualized assessment or instructions from physicians, nurses, occupational therapists, physical therapists, discharge planners, or other healthcare professionals.

    When bedroom preparation depends on a person’s mobility, abilities, transfer needs, equipment, assistance, or medical restrictions, confirm the appropriate approach with the healthcare professionals involved in that person’s care.
  • Hospital Discharge Home Checklist: What to Prepare Before They Come Home

    Hospital Discharge Home Checklist: What to Prepare Before They Come Home

    A hospital discharge home checklist can help families prepare when discharge happens quickly and there is very little time to get the home ready.

    The goal is not to redesign the house or predict every possible problem. Start by looking at the parts of the home the person will actually need to use when they return.

    This hospital discharge home checklist walks through the physical home from the vehicle drop-off point to the entrance, bathroom, sleeping area, and everyday walking routes. It also helps you identify questions that may need to be confirmed with the hospital, rehabilitation team, occupational therapist, physical therapist, or another professional involved in the discharge plan.

    Hospital Discharge Home Checklist: What to Verify Before They Come Home

    1. Arrival and Entrance
    2. Steps, Doorways and Thresholds
    3. Walking Routes Through the Home
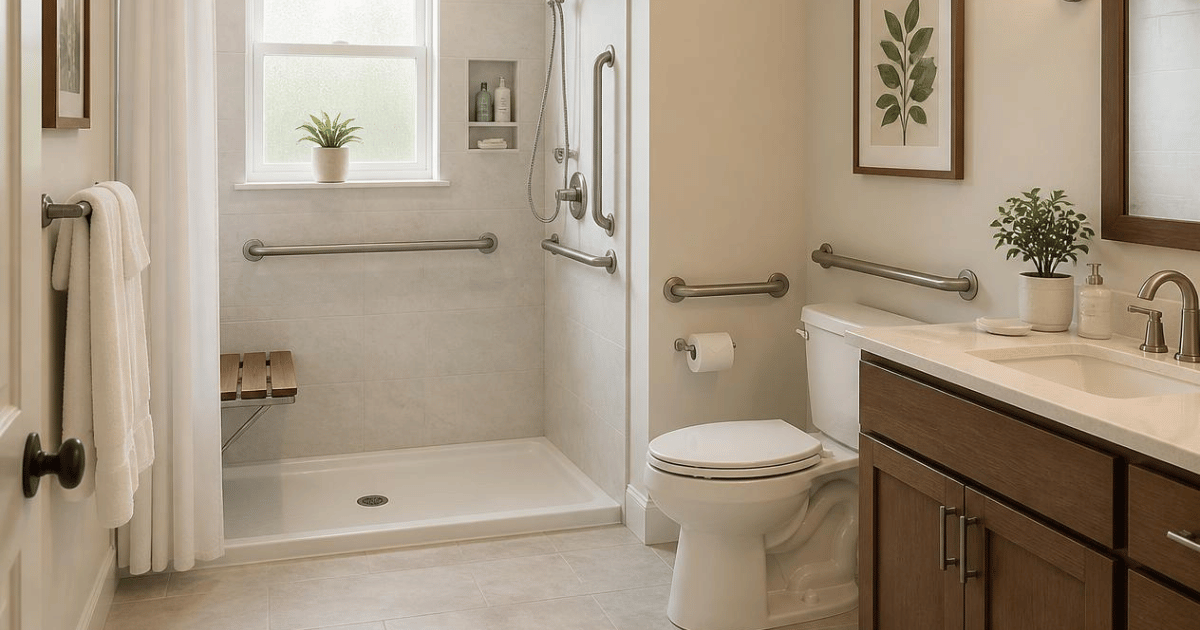
    4. Bathroom and Toilet Access
    5. Shower or Bathing Setup
    6. Sleeping and Recovery Area
    7. Nighttime Lighting
    8. Recommended Equipment or Home Changes
    9. Help Available at Home
    10. Questions to Verify Before Discharge

    Not sure what your home needs?

    For a more detailed entrance review, see our guide to Preparing Entrances and Steps After Hospital Discharge.


    Use the Home Readiness Check to walk through the home step by step and receive a personalized preparation plan.

    How to Use This Hospital Discharge Home Checklist

    A hospital or rehabilitation discharge can happen quickly. Families may suddenly have only a few days—or sometimes less—to figure out whether the home will work for the person who is coming back.

    You do not need to redesign the entire house. Start with the parts of the home the person will actually use: the path from the vehicle to the entrance, the bathroom, the sleeping area, and the routes between them.

    This hospital discharge home checklist helps you review those areas before the planned return. It can also help you identify questions that should be confirmed with the hospital, rehabilitation team, occupational therapist, physical therapist, physician, or another professional involved in the discharge plan.

    Not sure where to start?
    The Discharge Ready Home Home Readiness Check walks you through the home step by step and creates a personalized preparation plan based on your answers.

    Hospital Discharge Home Checklist

    Work through the home in the order the person is likely to experience it when they return.

    • Review the vehicle drop-off point and path to the entrance.
    • Check steps, handrails, doorways and thresholds.
    • Clear the main walking routes through the home.
    • Review bathroom and toilet access.
    • Look at the shower or bathing setup.
    • Prepare the sleeping or recovery area.
    • Check nighttime lighting.
    • Confirm recommended equipment or home changes.
    • Confirm who will actually be available to help.
    • Write down anything that still needs to be verified with the discharge or rehabilitation team.

    The goal is not to declare the home “safe.” The goal is to identify practical home-preparation issues early enough to address or verify them before they become an arrival-day problem.

    1. Start at the Vehicle Drop-Off Point

    Do not begin your review at the front door.

    Begin where the vehicle will actually stop.

    Walk the route from that point to the entrance the person expects to use. Look at the distance, walking surface, steps, narrow areas, gates, turns and anything else that could make the route difficult with a walker, wheelchair or hands-on assistance.

    If the usual entrance presents a problem, look at the other entrances before assuming the home needs to be modified.

    A side door, garage entrance or another existing route may provide an easier short-term solution.

    2. Check Steps, Handrails, Doorways and Thresholds

    Look closely at the entrance itself.

    If there are steps, check whether a secure handrail is already available and whether the person is expected to use those steps after discharge.

    Do not assume that someone can or cannot manage stairs. If you are uncertain, ask the discharge team, occupational therapist or physical therapist what they expect.

    Also look at the doorway and threshold.

    If a walker or wheelchair will be used, measure the usable clear opening, not simply the advertised or nominal door width.

    Check for raised thresholds or tight turns immediately inside the entrance.

    When another existing entrance works better, using it temporarily may make more sense than rushing into construction.

    3. Clear the Main Walking Routes

    Walk the paths the person will use most often.

    Pay particular attention to the routes between the entrance, bathroom, bedroom or recovery area, kitchen and main living space.

    Look for loose rugs, electrical cords, small furniture, pet items, boxes, clutter and tight turns.

    Start with the simplest changes.

    Moving a table, rolling up a loose rug or relocating a cord may improve the route without requiring equipment or remodeling.

    If the person will use mobility equipment, think about the space that equipment will need when turning and moving between rooms.

    For a more detailed review of pathways through the home, see our guide to Walking Routes After Hospital Discharge.

    4. Review Bathroom and Toilet Access

    The bathroom deserves special attention because it may be needed soon after the person returns home.

    First determine whether the person can reach the bathroom using the mobility equipment and assistance expected.

    Then look at the toilet area.

    Is there enough space to approach the toilet? Is there room for another person to assist if help is expected? Is another bathroom easier to use?

    Do not automatically purchase toilet-support equipment because something looks difficult.

    The appropriate solution depends on the person’s expected abilities, the available assistance, the bathroom layout and any recommendations already made by the discharge team, OT or PT.

    When you are uncertain, verify the expected assistance or equipment before purchasing or installing anything.

    For a more detailed bathroom review, see our guide to Bathroom Safety After Hospital Discharge.

    5. Look at the Shower or Bathing Setup

    Showers and tubs can present several different practical challenges.

    Look at the entrance to the shower or tub, available standing and turning space, nearby fixtures, and how much assistance the person is expected to need.

    Before considering permanent changes, determine whether another existing bathroom or bathing arrangement works better.

    A temporary alternative may provide a practical solution during the initial return-home period.

    If bathing equipment has already been recommended, confirm that the correct item has arrived and that you understand where and how the recommending professional expects it to be used.

    If you are unsure what assistance or equipment is appropriate, confirm that with the relevant healthcare professional before relying on a product or modification.

    6. Prepare the Sleeping or Recovery Area

    Consider how the person will reach the planned sleeping area.

    If the bedroom requires stairs, determine whether stair use has already been discussed as part of the discharge plan.

    If stairs may present a problem, look for an existing same-level space that could temporarily serve as a sleeping or recovery area.

    Then examine the room itself.

    Move unnecessary furniture or belongings so there is adequate usable space around the bed and along the route into the room.

    Consider whether another person will need room to assist.

    A temporary room arrangement can often address the immediate need while the family decides later whether any permanent change is necessary.

    For a more detailed bedroom review, see our guide on how to Prepare a Bedroom After Hospital Discharge.

    7. Check the Route at Night

    A route that appears easy during the day can look very different after dark.

    Walk from the sleeping area to the bathroom at night.

    Look for dark hallways, poorly lit turns, changes in floor level and places where the person would need to cross a dark area before reaching a light switch.

    Simple plug-in or motion-activated lighting may be worth considering when it improves visibility without creating a new obstacle.

    Follow manufacturer instructions for placement and use.

    If the home needs permanent electrical changes, consider a qualified electrician.

    8. Confirm Recommended Equipment or Home Changes

    Do not assume that something is ready simply because someone ordered it.

    Review the discharge paperwork and any recommendations from the hospital, rehabilitation facility, occupational therapist or physical therapist.

    Determine exactly what was recommended and by whom.

    Then confirm whether each item has:

    arrived, been assembled if necessary, been installed when required, and been placed where it is expected to be used.

    Where suitability or instructions matter, confirm them with the professional who made the recommendation before relying on the equipment.

    This step can prevent a family from discovering on arrival day that an important item is still in a box, has not arrived, or is not set up.

    For a more detailed equipment review, see our guide to Equipment Before Hospital Discharge.

    9. Confirm Who Will Actually Be Available to Help

    Some home arrangements only work when another person is present.

    Do not plan around assistance that may not actually be available.

    Identify who expects to help during the arrival home and during the first days afterward.

    Clarify when that person will be available and what tasks they expect to help with.

    If the amount of assistance required is unclear, confirm it with the discharge team, occupational therapist or physical therapist.

    If family or caregiver help cannot reliably cover an identified need, the family can then explore an appropriate professional home-support service.

    10. Make a “Things to Verify” List

    You will not always know every answer.

    That is normal.

    Instead of guessing, keep a short list of questions that need confirmation.

    You may need to verify expected stair use, toilet assistance, bathing assistance, mobility equipment, transfer help or equipment that was recommended during the discharge process.

    Bring those questions to the appropriate member of the care team before purchasing equipment or making significant changes to the home.

    The Agency for Healthcare Research and Quality also recommends involving patients and families in discharge planning and making sure they understand what life at home will be like after discharge.

    The Simplest Solution Often Comes First

    Preparing a home after a hospital or rehabilitation stay does not always require remodeling.

    An easier entrance, a different bathroom, a temporary sleeping area, moved furniture or a cleared walking path may solve an immediate problem.

    Start with what the home already offers.

    Then determine what still needs to be verified, purchased, arranged or professionally evaluated.

    That approach can help families focus their limited time and attention on the parts of the home that matter most for the planned return.

    Get a Personalized Home Readiness Plan

    Every home and return-home situation is different.

    The Discharge Ready Home Home Readiness Check walks through the entrance, walking routes, bathroom, sleeping area, lighting, equipment and available help one step at a time.

    Important Note

    Discharge Ready Home provides general educational information about preparing the physical home.

    This checklist does not evaluate a person’s medical condition, determine whether someone is ready for discharge, certify that a home is safe, prescribe medical equipment, or replace an individualized assessment or instructions from physicians, nurses, occupational therapists, physical therapists, discharge planners or other healthcare professionals.

    When a home-preparation decision depends on a person’s abilities, mobility, transfer needs, equipment or medical restrictions, confirm the appropriate approach with the healthcare professionals involved in that person’s care.

  • Bathroom Safety After Hospital Discharge: What to Review Before Someone Comes Home

    Bathroom Safety After Hospital Discharge: What to Review Before Someone Comes Home

    Bathroom safety after hospital discharge deserves attention before someone comes home from a hospital or rehabilitation stay. A bathroom that worked well before a hospital or rehabilitation stay may become much more difficult to use during recovery.

    Someone returning home may have less strength, reduced balance, limited endurance, or new mobility equipment. They may be using a walker, cane, wheelchair, shower chair, or other support for the first time. Even familiar tasks, getting on and off the toilet, stepping into a shower, turning around, reaching for a towel, or walking to the bathroom at night, may require more effort than they did before.

    That is why reviewing bathroom safety after hospital discharge can be an important part of preparing the home.

    The goal is not to assume that recovery will be difficult or that permanent remodeling is necessary. The goal is to identify potential problems before discharge day, while there is still time to ask questions, rearrange the room, obtain recommended equipment, or contact an appropriate professional.

    This guide focuses on practical features of the bathroom. It is educational information, not medical advice or a professional home-safety assessment. Always follow the instructions provided by the person’s physician, nurse, occupational therapist, physical therapist, discharge planner, or other healthcare professional.

    For a broader room-by-room review, use our Hospital Discharge Home Checklist to check entrances, walking routes, bathrooms, sleeping areas, lighting, equipment, and available help before they come home.

    Start With the Route to the Bathroom

    Bathroom safety begins before someone enters the bathroom.

    Consider the complete route from the person’s likely sleeping or recovery area to the bathroom. If they will be walking at night, imagine that route when the house is dark and the person is tired.

    Look for:

    • Loose rugs or runners
    • Electrical cords
    • Pet bowls
    • Small tables or decorative objects
    • Narrow turns
    • Clutter near the doorway
    • Changes in floor height
    • Poor lighting
    • Furniture that restricts the path
    • Doors that are difficult to open

    A clear path does not necessarily mean removing everything from the home. It means making the route as predictable and unobstructed as possible.

    If the person will use a walker or wheelchair, check whether there is enough room to move through the hallway and approach the bathroom door. A route that is comfortable for someone walking independently may be too narrow for mobility equipment or for another person providing assistance.

    You can also consider whether the bathroom door should remain open during the initial recovery period, if privacy and household circumstances allow. A door that is difficult to open or close may create an unnecessary obstacle.

    Check the Bathroom Entrance and Doorway

    The bathroom entrance deserves a close review.

    Ask:

    • Does the door open in a way that blocks access?
    • Is the doorway wide enough for the expected mobility equipment?
    • Is there a threshold that could catch a foot or walker?
    • Can the person operate the door handle easily?
    • Is there enough space to turn around once inside?
    • Could another person assist without being trapped behind the door?

    A person with limited balance may have difficulty stepping over even a small threshold. A walker may catch on an uneven transition between flooring surfaces. A wheelchair may require more turning space than the room currently provides.

    Do not assume that the person will be able to use the bathroom exactly as they did before hospitalization. Ask the healthcare team what equipment or level of assistance is expected, then compare those needs with the actual bathroom layout.

    Review the Toilet Area

    Getting on and off the toilet can require significant leg strength, balance, and control.

    Review the height of the toilet, the available space around it, and whether the person can approach and leave it safely. A low toilet may be particularly difficult for someone with weakness, pain, balance concerns, or limited knee or hip movement.

    Potential questions include:

    • Is the toilet too low for the person to sit down and stand up comfortably?
    • Is there enough space to approach from the expected direction?
    • Is the floor stable and dry?
    • Is lighting adequate?
    • Is support available where it is actually needed?
    • Can the person reach toilet paper and other necessities without twisting or leaning too far?

    A towel bar, sink edge, or other bathroom fixture should not automatically be treated as a support bar. These items may not be designed to bear a person’s weight and could pull loose or cause a fall.

    If a raised toilet seat, grab bar, toilet safety frame, or other equipment is recommended, follow the manufacturer’s installation instructions and seek professional help when needed. The appropriate equipment depends on the person, the bathroom, and the instructions from their healthcare team.

    Planning for bathroom safety after hospital discharge means comparing the bathroom with the person’s expected mobility and assistance needs.

    Examine the Shower or Tub Entry

    The shower or tub entrance is one of the most important areas to review.

    Stepping over a tub wall or into a shower can be difficult when someone has reduced balance, weakness, pain, or limited ability to lift a leg. Water and soap can also make surfaces slippery.

    Look at:

    • The height of the tub or shower threshold
    • Whether the person can step over it safely
    • Whether a walker can be positioned nearby
    • Whether the floor becomes slippery when wet
    • Whether the shower door or curtain interferes with entry
    • Whether there is enough room for assistance
    • Whether water reaches the floor outside the bathing area
    • Whether controls and shelves are easy to reach

    Do not assume that a person who could use the shower independently before hospitalization can do so immediately after returning home. Their needs may change temporarily during recovery.

    A shower chair, tub bench, handheld shower head, transfer bench, or other equipment may be appropriate in some situations. However, equipment should be selected and used according to professional guidance and manufacturer instructions.

    Look at Support Locations

    Support should be available where the person needs it, not simply wherever there is an open wall.

    A properly installed grab bar may help with specific movements, such as:

    • Entering or exiting a shower
    • Lowering onto or rising from the toilet
    • Turning or repositioning
    • Maintaining balance near wet surfaces

    The correct location, height, orientation, and attachment method matter. A grab bar that is installed in the wrong place may not provide useful support. A bar attached improperly may pull away from the wall.

    Do not use a towel rack as a substitute for a grab bar. Towel racks are generally designed to hold towels, not support body weight.

    The National Institute on Aging also recommends measures such as bathroom grab bars, good lighting, and reducing slip hazards in the home.

    For permanent or structural installations, consult a qualified professional. If the person is working with an occupational therapist or physical therapist, ask whether they can provide recommendations based on the person’s movement and transfer needs.

    Reduce Slip and Trip Hazards

    Bathroom floors can become hazardous when water, soap, loose mats, or clutter are present.

    Review:

    • Bath mats
    • Shower mats
    • Loose rugs
    • Floor transitions
    • Water near the tub or shower
    • Soap or shampoo on the floor
    • Damp clothing or towels
    • Clutter near walking areas
    • Uneven or damaged flooring

    A mat that slides across the floor can create a problem rather than solve one. If a bath mat is used, it should be appropriate for the surface and secured according to the manufacturer’s guidance.

    Keep frequently used items in stable, easy-to-reach locations. Reaching into a high cabinet, bending deeply, or stepping onto a stool can create unnecessary risk during recovery.

    It may also help to wipe up water promptly and keep towels within comfortable reach. The person should not have to walk across a wet floor to retrieve a towel.

    Improve Bathroom Lighting

    Good lighting is a simple but important part of bathroom safety after hospital discharge, especially along the route used at night.

    Check whether the person can:

    • Find the bathroom route safely
    • Identify obstacles on the floor
    • See changes in floor height
    • Locate the toilet and shower
    • Reach the light switch
    • Turn on lighting before entering a dark area

    Reviewing bathroom safety after hospital discharge before the return date gives families time to make simple changes or ask the right questions.

    A night-light may help, but it should not create a trip hazard or block the walking path. Consider lighting along the route from the bedroom to the bathroom as well as inside the bathroom itself.

    Glare can also affect visibility, particularly on shiny or wet surfaces. The goal is even, useful illumination that helps the person see where they are stepping and what they are reaching for.

    Keep Everyday Items Within Reach

    Bathroom preparation is not limited to large equipment.

    During recovery, it may be helpful to place everyday items where they can be reached without excessive bending, stretching, or twisting.

    Depending on the person’s needs, this could include:

    • Towels
    • Soap
    • Shampoo
    • Toothbrush and toothpaste
    • Toilet paper
    • Personal-care items
    • Clothing
    • A phone or emergency contact method

    Avoid placing important items on the floor or in locations that require balancing while reaching. A person should not need to stand on one leg, lean across the shower, or climb to access basic supplies.

    If the person will need assistance, organize items so a caregiver can help without blocking the doorway or forcing the person to move unnecessarily.

    Consider Privacy and Emergency Access

    Bathroom safety also includes planning for situations in which help may be needed.

    Consider:

    • Whether the person can call for help
    • Whether a phone or alert device is accessible
    • Whether the bathroom door can be unlocked from outside in an emergency
    • Whether a caregiver can enter and assist
    • Whether the person understands how to request help
    • Whether the household has agreed on what to do if the person falls

    Do not place a phone where it could be reached only by stepping into the shower or leaning dangerously. Keep emergency contact information accessible in another location as well.

    If the healthcare team has provided specific instructions about supervision or assistance, those instructions should take priority.

    Ask the Healthcare Team Specific Questions

    Before discharge, families may want to ask questions that connect the person’s needs with the bathroom’s actual layout.

    Useful questions include:

    • Is the person allowed to shower independently?
    • Does the person need assistance with transfers?
    • Is a shower chair or tub bench recommended?
    • Is a raised toilet seat appropriate?
    • Should the person use a walker inside the bathroom?
    • Is weight-bearing limited?
    • Are there movement restrictions?
    • Does the person need someone nearby during nighttime bathroom trips?
    • Should the bathroom be on the same floor as the recovery area?
    • Who can help evaluate equipment or installation?

    A discharge planner, occupational therapist, physical therapist, nurse, or other qualified professional may be able to provide guidance specific to the person’s condition and abilities.

    Use a Room-by-Room Home Readiness Check

    The bathroom is only one part of preparing the home.

    Entrances, walking paths, bedrooms, lighting, and everyday living areas may also need attention before someone returns from the hospital or rehabilitation. For more practical home-preparation guidance, visit our Resources page.

    The Home Readiness Check walks through common areas of the home with simple questions. It is free, takes only a few minutes, and does not require medical records or sensitive health information.

    Final Bathroom Safety Checklist

    Before someone comes home, review whether:

    • The route to the bathroom is clear.
    • The bathroom doorway works for the mobility equipment or assistance expected.
    • The floor is stable and as slip-resistant as possible.
    • Water can be controlled and cleaned up promptly.
    • The toilet is practical for the person’s current abilities.
    • Shower or tub entry has been evaluated.
    • Support equipment, if used, has been selected and installed according to the relevant professional and manufacturer guidance.
    • Frequently used items are within comfortable reach.
    • Lighting is adequate during the day and at night.
    • A method of calling for help is available.
    • The healthcare team’s instructions have been followed.
    • The person knows when to ask for assistance.

    A few simple changes may be enough. In other situations, the bathroom may require equipment, professional installation, or a different recovery arrangement. The most important step is to identify the potential problem before it becomes an urgent problem.

    Bathroom Safety After Hospital Discharge: Prepare Before Discharge Day

    Bathroom safety after hospital discharge should be considered as part of the larger home-preparation process.

    You do not have to predict every possible need or permanently change the entire home. Start by looking at the bathroom through the eyes of the person who will use it during recovery. Think about how they will enter, turn, sit, stand, bathe, reach, and move through the space.

    Then compare what you observe with the guidance provided by the healthcare professionals involved in their care.

    Discharge Ready Home is based in Port Charlotte, Florida, helping families prepare the physical home before someone returns from a hospital or rehabilitation facility.

    The Home Readiness Check can help you review the bathroom and other everyday areas of the home before someone comes home from the hospital or rehabilitation.

    This article is for general educational purposes only. It is not medical advice, a professional home inspection, or a substitute for guidance from qualified healthcare professionals.

  • How to Prepare Your Home Before Hospital Discharge

    How to Prepare Your Home Before Hospital Discharge

    When someone is preparing to come home from the hospital or a rehabilitation facility, it is easy to focus on medications, appointments, transportation, and discharge instructions. Taking time to prepare the home before hospital discharge can help identify potential problems while there is still time to address them. But preparing the home before hospital discharge deserves just as much attention. Those things matter, but one important question often receives far less attention: Is the home itself ready for the person who is coming back?

    A house that worked perfectly well before a hospital stay may not work quite as well afterwards. Someone may return home using a walker for the first time. A few steps at the front door may suddenly feel much more difficult. A bathroom that never seemed difficult to use may become harder to use. A low bed, loose rug, narrow walking path, dark hallway, or slippery shower can become a much bigger concern when strength, balance, endurance, or mobility have changed.

    That is why preparing the home before hospital discharge can make such a difference. The goal is not to turn the house into a medical facility or assume that someone will have permanent limitations. The goal is much simpler: look at the home through the eyes of the person who will be using it when they return.

    The best time to identify a home-accessibility problem is BEFORE the returning person is about to enter.

    For a room-by-room review, use our Hospital Discharge Home Checklist to walk through the entrance, bathroom, sleeping area, lighting, equipment, and available help before they come home.

    How to Prepare the Home Before Hospital Discharge

    It is easy to think, We’ll see what they need once they get home.

    That sounds reasonable, but it can create unnecessary pressure on discharge day. Taking time to prepare the home before hospital discharge can help identify potential problems before the person returns. If the person arrives home and cannot comfortably manage the entrance steps, reach and use the bathroom with the mobility equipment or assistance expected, get into bed, or move a walker through the main living areas, the family suddenly has to solve those problems while also helping someone settle back into the home.

    Preparing the home before someone comes home from the hospital gives the family time to notice these issues without that pressure.

    And preparation does not automatically mean expensive remodeling.

    Sometimes home preparation after a hospital stay means moving a small table that blocks a hallway. Sometimes it means securing a loose rug, improving a light bulb, rearranging furniture, moving frequently used items within easier reach, or creating a temporary sleeping area on the main floor.

    Other situations may require more planning, such as adding secure handrails, installing grab bars, obtaining a shower chair, creating a safer entrance, widening a path for mobility equipment, or making a bathroom easier to use.

    The important part is discovering the potential problem before it becomes an actual problem.

    Look Carefully at the Entrance to the Home

    Hospital discharge home preparation should start before you even walk through the front door.

    Consider the path from the driveway, vehicle, garage, or sidewalk to the entrance the person will actually use. Is the walking surface stable? Are there uneven areas, loose stones, damaged concrete, clutter, hoses, landscaping obstacles, or other trip hazards?

    If there are steps, look at the handrails. A railing that once served mostly as decoration may become an important source of support after someone returns from the hospital or rehab.

    Also consider the doorway itself. A person who previously walked through the entrance without thinking may now need additional room for a walker, wheelchair, cane, or assistance from another person.

    Families sometimes assume that because someone could enter the home before hospitalization, they will be able to enter it the same way afterward. That may be true. But hospital discharge can temporarily change strength, balance, mobility, and endurance, which is exactly why the entrance deserves a second look.

    Clear the Main Walking Paths

    Inside the home, imagine the routes the person will use most frequently.

    Think about the path from the entrance to the bedroom. From the bedroom to the bathroom. From the living room to the kitchen. From the sleeping area to the bathroom in the middle of the night.

    Now look at those paths differently.

    Are there electrical cords crossing the floor? Small tables? Decorative furniture? Pet bowls? Floor plants? Magazine baskets? Loose rugs? Tight turns? Changes in flooring height?

    None of those things may have caused problems before. But preparing a home after a hospital stay often involves recognizing that ordinary household objects can become obstacles when someone is recovering or using mobility equipment.

    You do not necessarily need to remove everything from the home. The objective is simply to create clear, predictable walking paths through the rooms the person will use most often.

    If a walker or wheelchair may be needed, allow enough space for the equipment rather than assuming the existing furniture arrangement will work.

    Bathroom Safety When You Prepare Your Home Before Hospital Discharge

    The bathroom deserves more scrutiny than almost any other room when preparing a home for someone coming home from the hospital. When families prepare their home before hospital discharge, they have time to address these everyday obstacles before the person returns.

    Bathrooms combine hard surfaces, water, tight spaces, changes in position, and activities that often require balance. Getting on and off the toilet, stepping into a shower or tub, turning around in a confined space, and reaching for towels or toiletries can all become more difficult during recovery.

    Look at whether secure grab bars are available where support may be needed. Check whether the shower or tub has a slip-resistant surface. If bathroom equipment has been recommended or appears worth considering, confirm the appropriate type and use with the relevant healthcare professional before relying on it.

    One common objection is, They can just use the towel bar.

    That is not the same thing as a properly installed grab bar. Many towel bars are designed to hold towels, not a person’s body weight.

    Another objection is, We don’t want the bathroom to look institutional.

    Fortunately, modern bathroom safety products and aging-in-place modifications can blend into a residential bathroom far better than many families expect. More importantly, many modifications can be temporary or modest. Preparing the bathroom does not necessarily mean undertaking a major renovation.

    The goal is not to redesign the room simply because someone had a hospital stay. The goal is to ask whether the bathroom will be practical for the person who is about to use it.

    Create a Practical Bedroom and Recovery Space

    The bedroom may also need another look before hospital discharge.

    Can the person get into and out of the bed comfortably? Is there enough clear space around the bed? Can a walker fit alongside it? Is there room for another person to provide assistance if needed?

    If the normal bedroom is upstairs and stairs may be difficult during the early part of recovery, families may want to consider whether a temporary sleeping and recovery space can be created on the main floor.

    This is another area where people sometimes resist because they do not want to make permanent changes for what may be a temporary situation.

    They may not need to.

    A temporary recovery space can sometimes solve the immediate problem without permanently changing the home. The purpose of preparing the home before hospital discharge is not to predict the future. It is to make the next stage of recovery easier to manage.

    Frequently used items should also be within comfortable reach. Phones, chargers, glasses, water, clothing, personal items, and other everyday necessities should not require unnecessary bending, stretching, climbing, or repeated trips across the house.

    Improve Lighting Before Someone Comes Home

    Lighting is easy to overlook because families already know their own homes so well.

    But familiarity can hide problems.

    A hallway that seems adequately lit to one family member may feel very different to someone who is tired, recovering, moving slowly, or getting up during the night.

    Pay particular attention to stairs, entrances, hallways, the bedroom-to-bathroom route, and changes in floor level.

    Can the person turn on the light before entering a dark area? Are switches easy to reach? Are bulbs bright enough to clearly identify obstacles and changes in elevation?

    Preparing a home before someone comes home from rehabilitation does not always require construction. Better lighting is a perfect example of a relatively simple improvement that can make the home easier to navigate.

    Make Everyday Living Areas Easier to Use

    Recovery does not happen only in the bedroom.

    The person coming home may spend much of the day in the living room, family room, kitchen, or another familiar part of the house.

    Look for stable seating that is easy to get into and out of. Very low couches and deep upholstered chairs can sometimes be harder to use when someone has limited strength or mobility. A stable chair with supportive arms may be easier.

    In the kitchen and other commonly used areas, move frequently used items into comfortable reach when possible.

    A family member may say, I’ll be there to help them.

    That help can be extremely valuable. But a well-prepared home can reduce the number of times assistance is needed for ordinary tasks. The goal is not to eliminate caregiving. It is to remove unnecessary obstacles from the environment.

    Don’t Assume the Hospital Will Inspect the Home

    Families may understandably believe that the hospital, rehabilitation facility, discharge planner, occupational therapist, physical therapist, nurse, or physician will identify everything that needs to change at home.

    Healthcare professionals can provide extremely important guidance, particularly when a person has specific medical, mobility, therapy, or equipment needs.

    But the healthcare team does not necessarily know every detail of the home.

    They may not know that there are three steps from the garage into the house, that the main bathroom has a narrow doorway, that the bedroom is upstairs, that the hallway contains several loose rugs, or that the shower requires stepping over a high tub wall.

    That is why home preparation and medical discharge planning should complement one another.

    The healthcare team understands the person’s medical and functional needs. The family understands the home.

    Bringing those two pieces together can produce a much better transition home.

    You Do Not Have to Know Everything Before You Start

    Another common obstacle is uncertainty.

    Families may think, I don’t know what we’re supposed to look for.

    That is understandable. Most people have never systematically evaluated a house for hospital discharge, rehabilitation discharge, mobility changes, or aging-in-place concerns.

    You do not need to become a home-accessibility expert overnight.

    Start with simple questions.

    Can the person get inside? Can they move through the rooms they need to use? Can they reach the bathroom? Can they use the bathroom? Can they get into and out of bed? Can they see where they are walking? Can they reach the things they use every day?

    Those questions alone can reveal a surprising number of potential home-readiness concerns.

    Preparing the Home Does Not Mean Assuming the Worst

    Some families hesitate to make changes because preparing for mobility or accessibility problems can feel like admitting that recovery will be difficult.

    It does not have to mean that at all.

    Preparing the home is simply contingency planning.

    We put a spare tire in a car without expecting a flat tire. We install smoke detectors without expecting a house fire. In the same way, reviewing the home before hospital discharge does not mean expecting something to go wrong.

    It means reducing avoidable problems when someone is already going through a major transition.

    Some modifications may only be needed for a few weeks. Others may prove useful much longer. Either way, it is generally easier to evaluate those needs thoughtfully before discharge than to discover them under pressure afterward.

    Prepare the Home Before Hospital Discharge With a Home Readiness Check

    Discharge Ready Home created the Home Readiness Check to make this process easier for families.

    The check walks through common areas of the home, including entrances and steps, walking paths, bathrooms, bedrooms and recovery spaces, lighting, and everyday living areas. You do not need to renovate the entire house to prepare your home before hospital discharge; sometimes a few thoughtful changes can make the home much easier to use.

    Instead of asking for medical records, diagnoses, medications, insurance information, or other sensitive health information, the Home Readiness Check focuses on the physical home.

    You answer a series of simple questions about the house, and the tool identifies items that may deserve attention before someone returns from the hospital or rehabilitation facility.

    The results appear immediately on screen, and you can optionally email yourself a copy.

    The Home Readiness Check is educational and does not determine whether someone is medically ready for discharge. It also does not replace advice from physicians, nurses, physical therapists, occupational therapists, discharge planners, or other healthcare professionals.

    What it does provide is something many families need during a hectic time: a structured way to look at the home before the person comes through the door.

    Ready to see what your home may need?

    Start the free Home Readiness Check and review the areas of the home that may deserve attention before someone comes home from the hospital or rehabilitation.